Fixing the Screen of my Google Pixel 6
In the past decades, I owned different phones, like Apple iPhone, Windows Phone, and since Google started the Pixel series, I’m using a Google Pixel. I had Pixel (1) XL, Pixel 5, and my current phone is a Google Pixel 6. It’s amazing, even after 3.5 years the battery and the phone as such is still pretty solid. And now I even was able to repair a broken screen so easily, and instead of getting a new one, I’m continuing to using this phone.
I dropped the Pixel 6 quite some times, and it was always OK. Maybe because I’m using a case. But when I dropped it last summer (Summer 2024), the screen was broken afterwards. I thought that it would’ve been probably a great time to get a new phone. But instead of this, I decided to get a repairset from iFixit.
In the past decades, I repaired broken screens on different phones, sometimes on my own phones, sometimes on those from family members and friends. Windows Phone fans will know which phone you can see on the picture below. Probably you’ll know. As it is lying very flat on the desk, it means it’s not the Nokia Lumia 1020 with the amazing and big camera. Instead, it’s the Nokia 920, also an amazing phone. On the left is the new screen, on the right is the yellow Nokia Lumia 920. I successfully repaired that phone, but it’s been a while. This picture is from 2013.

Later I repaired also other phones, also a Google Pixel 5, and now a Google Pixel 6.
This means, I am not a beginner in replacing broken screens. But I was totally impressed how easy it was to repair the Google Pixel 6, and that’s why I blog about it. On no other phone the screen replacement was as easy as on the Pixel 6. I don’t know what it looks like on a Pixel 7, 8 or 9. I plan to grab a Pixel 10 when it comes out, and hopefully I’ll never break the screen. But for now, I stay on the Pixel 6.
Repair the Google Pixel 6
To repair the broken screen of my Pixel 6, I ordered this repair set from ifixit. Below you see the packages. Two packages with Repair Tools, and another one with the Repair Part, which contains the screen. The phone on the right contains the broken screen. The crack is barely visible, but when you turn the phone on, it only shows some random horizontal lines.

The repair tools contain a bit driver and a set of different star drive bits (torx T3 and T5), and several tools like a suction handle to pull up the screen, opening picks that are a bit too big to re-use them to play the guitar, and the iOpener. The iOpener is the black thing that is lying already on the phone.

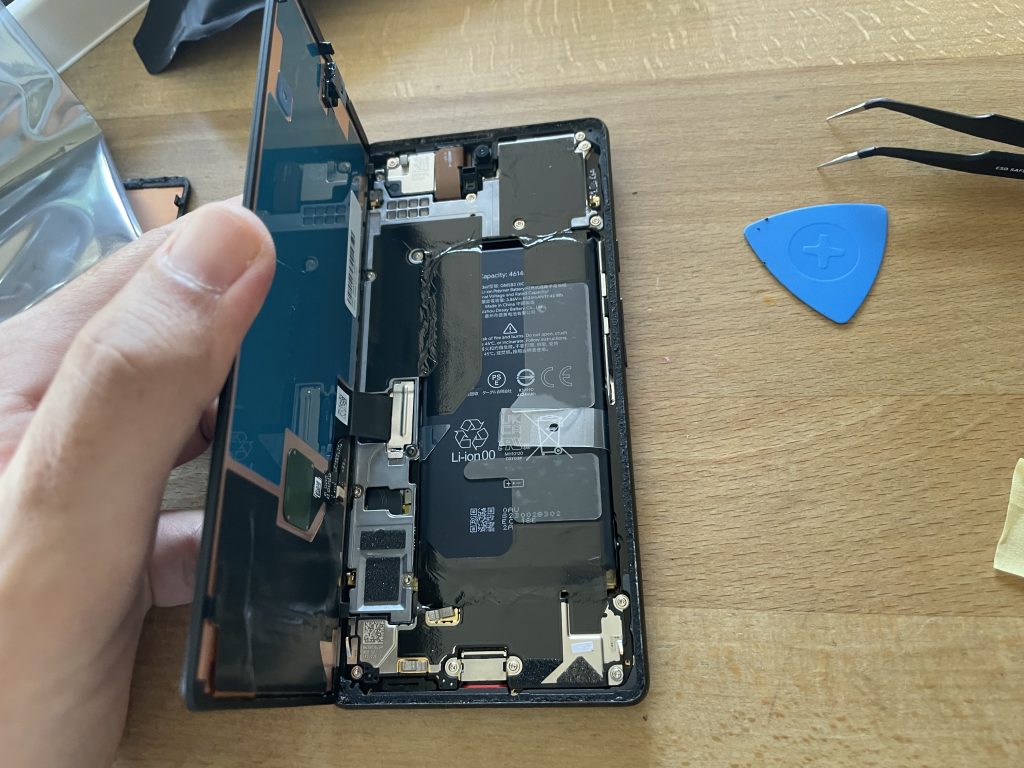
The iOpener can be put into the microwave. I put it in at 600W for 30 seconds. Then it was hot, and you can put it on the edges of the screen, so that the glue loses its power. I put it for 20 seconds on each edge, then I used the opener picks to lift up the screen. You can lift it up like opening a book, and then there’s a single cable that you have to disconnect. To do this, a little metal bracket has to be removed, then the cable can be pulled out. iFixit has a fantastic tutorial that shows how to do all of this. The picture below shows my detached screen.

Assembling the new screen works exactly the same way in the opposite order. But before you start, don’t forget to remove the little black sticker on the camera hole of the new screen. (Of course, I forgot it the first time and wondered afterwards why the front camera was always just black 😎). With the sticker removed, attach the cable and the metal bracket like in the picture below.
The repair set also included a double-sided sticker to glue the new screen. I didn’t need it, as the remaining glue was still sufficient to hold the new screen. On the picture below you can see the new screen attached, the old screen is on the left.

After this, the Pixel 6 worked again as before. The only thing that was off was the fingerprint sensor. To make it work again, you have to callibrate it. To do this, Google has a fingerprint callibration tool that you find on their Pixel repair website: https://pixelrepair.withgoogle.com/
Summary
Repairing the Pixel 6 was super easy. Well done Google and iFixit. Instead of getting a new phone, I continue to use my Pixel 6 for a while.
Thanks for reading,
Thomas
Leave a Reply